Get Your Own MISP Instance
This chapter helps you get your own MISP instance up and running. There are several ways to deploy MISP depending on whether you want a quick evaluation or a production instance; the authoritative, always-current instructions live on the MISP project download page and in the MISP repository, so this chapter points you at the right option rather than reproducing install steps that change between releases.
Choosing a deployment method
- Official installer — the recommended way to run a production MISP on your own host. MISP provides an installer script and step-by-step guides for the supported operating systems (recent Ubuntu, Debian and RHEL-based distributions). Start from the download page.
- Docker — the misp-docker project provides official container images and a
docker composesetup, which is a convenient way to run MISP (and misp-modules) in containers. - Cloud images — MISP can be deployed from cloud/marketplace images and with infrastructure-as-code; see the download page for the current options.
- Evaluation virtual machine — for a quick try-out or a training session, CIRCL maintains a ready-to-run virtual machine image (see below). It is well suited to evaluation and training, but a fresh install or container deployment is preferred for production.
Whichever method you choose, keep the instance updated (see the FAQ and updating the Python libraries), and review the requirements chapter for the supported software versions.
Evaluation virtual machine
CIRCL maintains an up-to-date MISP virtual machine image, regenerated regularly from the MISP repository. It is an easy out-of-the-box option, well suited to product evaluation and to training sessions.
Download
The best place to get the latest MISP virtual machine image, along with the available training materials, is the MISP training materials page on the CIRCL website. Download the image and validate its SHA512 fingerprint before using it.
Import the appliance
In VirtualBox, use Import Appliance… to import the virtual machine.
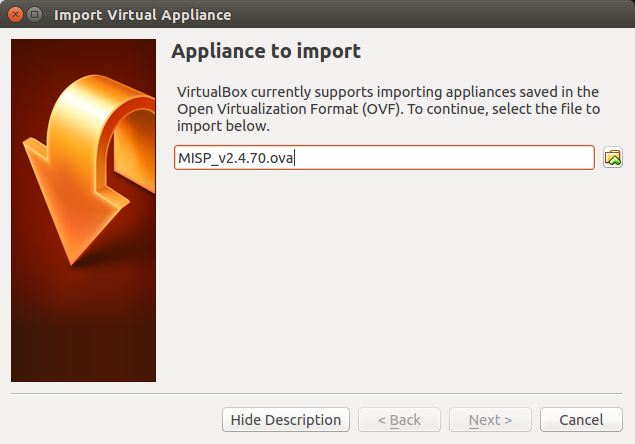
These instructions cover VirtualBox; for other virtualisation solutions (such as VMware) see the notes on the training materials page. ESXi servers have also been tested, though you may need to adjust the ATA bus manually.
Credentials
- GUI admin:
admin@admin.test/admin— the site-admin account with full rights (create your own users and change this immediately). - Shell/SSH:
misp/Password1234. - MySQL: generated when the VM is built; the details are in
~misp/mysql.txt.
Networking
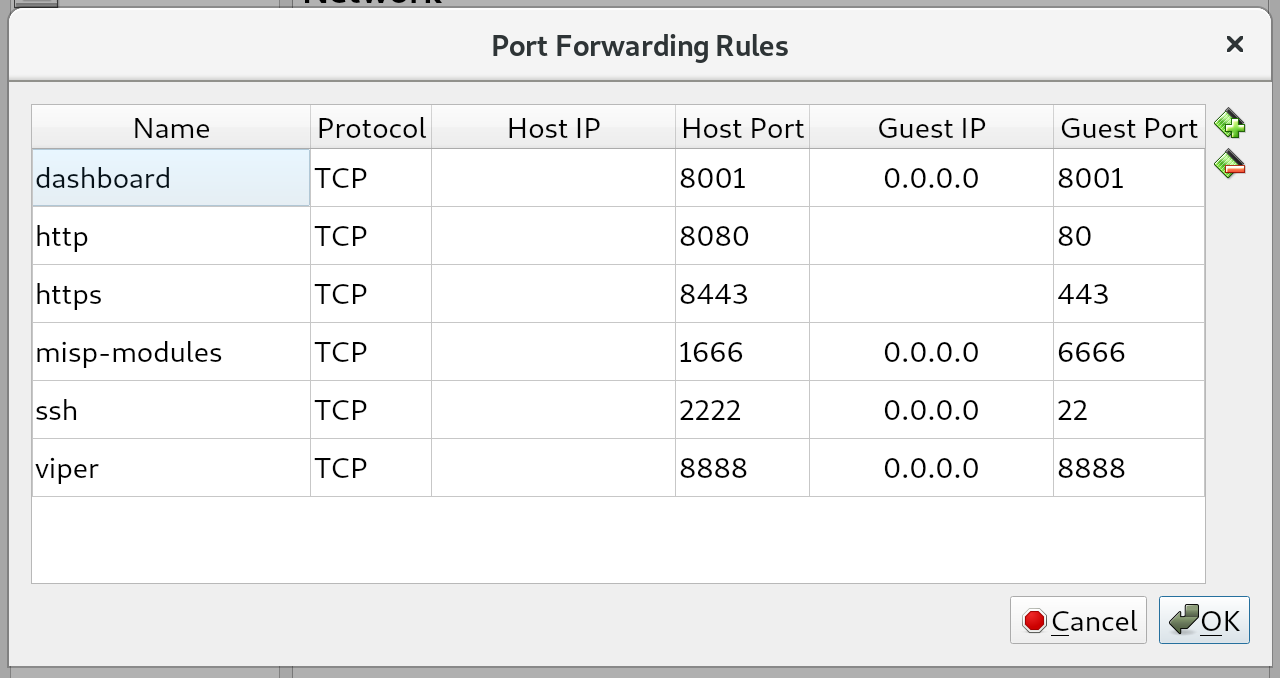
By default the VM is reachable via SSH on host port 2222 and the web UI on http://localhost:8080/. VirtualBox forwards a set of host ports to the guest:
- ssh — 2222 on host → 22 on guest
- http — 8080 on host → 80 on guest (main web UI)
- https — 8443 on host → 443 on guest (not in use by default)
- MISP dashboard — 8001 on host → 8001 on guest
- misp-modules — 1666 on host → 6666 on guest
To change the forwarding, select the running VM and go to Settings → Network → Advanced → Port forwarding.
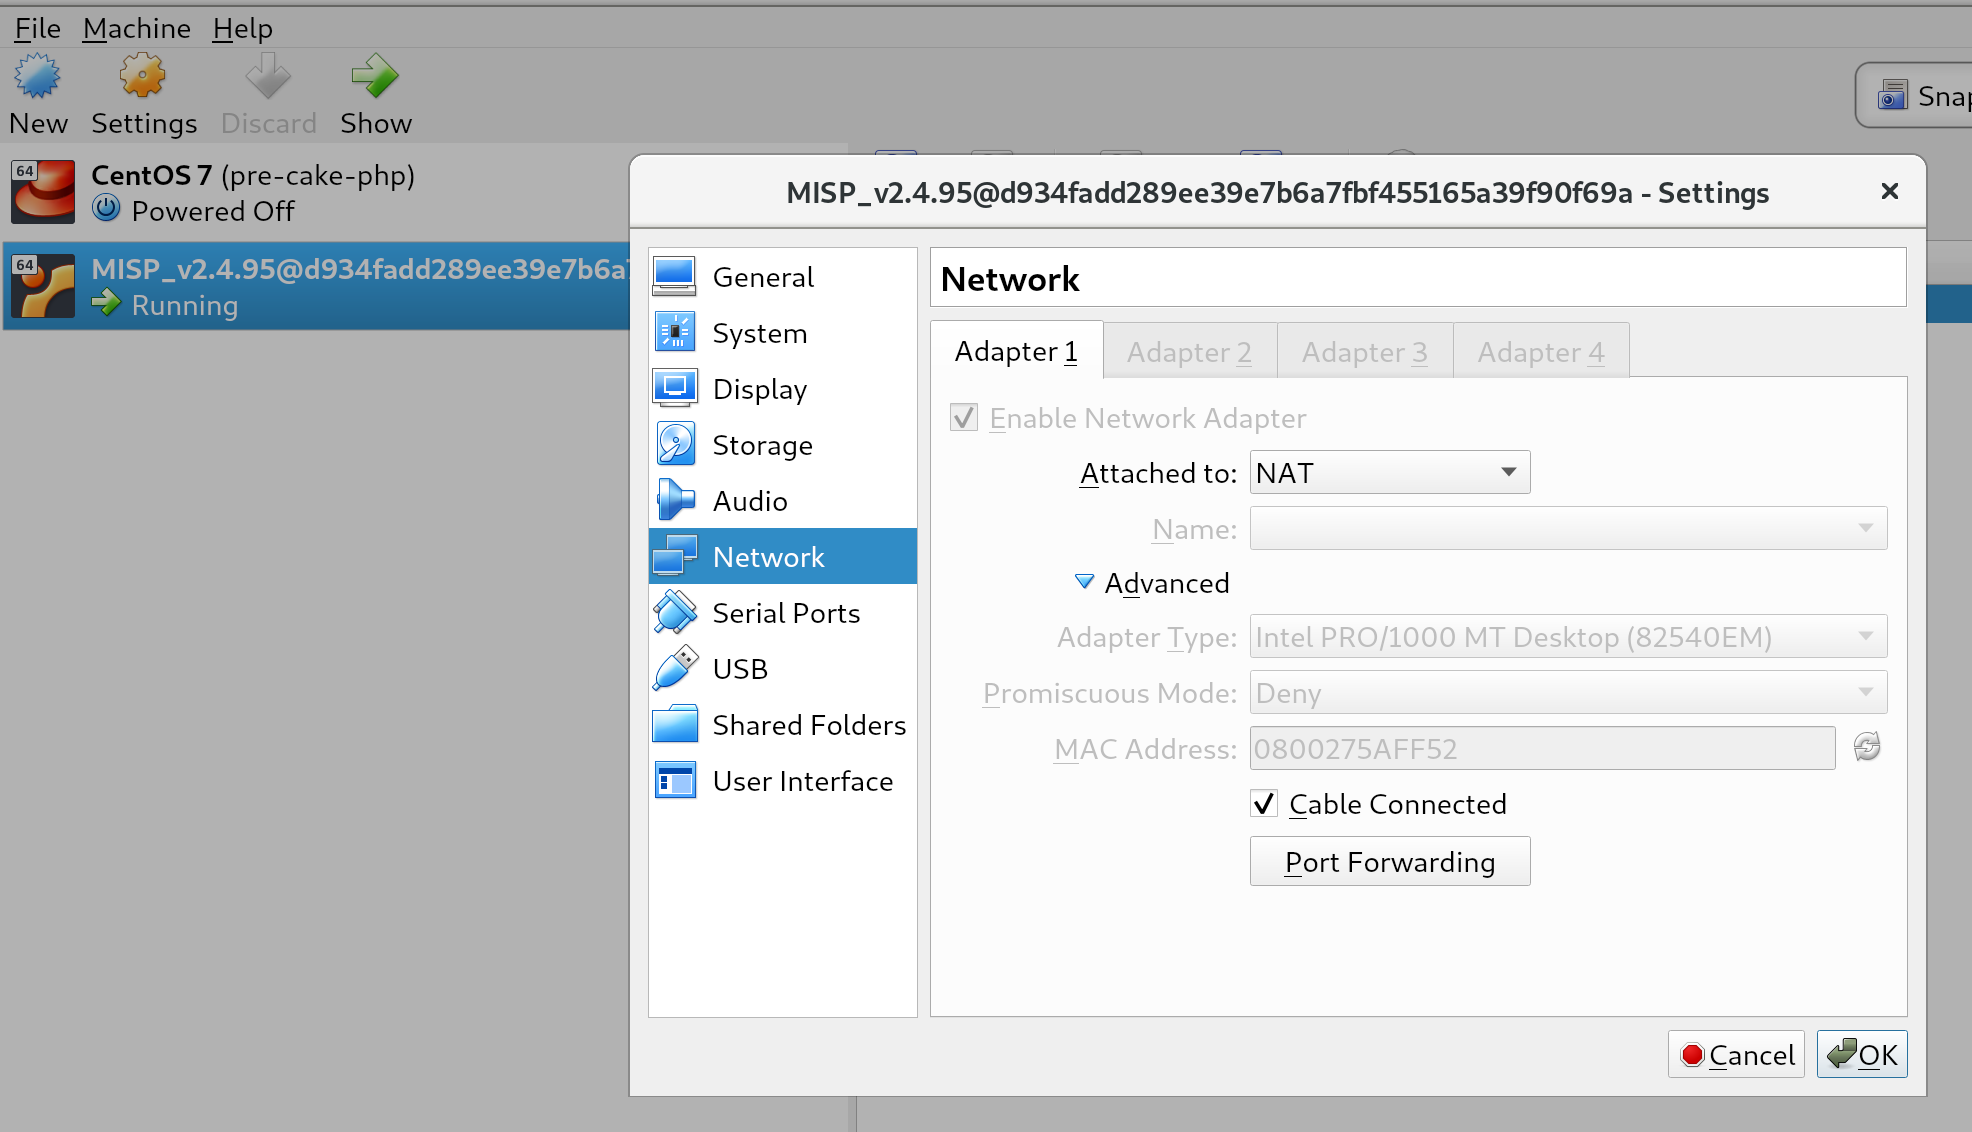
VMware users connect to whatever IP the VM has on the host — there is no port forwarding as with VirtualBox.
Setting the base URL
If you access the VM from another host, set the base URL in the MISP settings. From the command line:
sudo -u www-data /var/www/MISP/app/Console/cake Baseurl [baseurl]You can confirm it in the config:
grep baseurl /var/www/MISP/app/Config/config.phpAn external base URL can be set later, from the GUI or the command line (changing it is never required just to reach the GUI):
sudo -u www-data /var/www/MISP/app/Console/cake Admin setSetting MISP.external_baseurl [external_baseurl]