Using the System
This chapter walks through the day-to-day work of an analyst in the MISP web interface: creating events, populating them with attributes and objects, adding context (tags, galaxies, analyst data), collaborating with other organisations, and finally publishing and sharing your findings. Individual subsystems have their own dedicated chapters — this chapter shows how they come together in the normal event workflow and links out for the details.
The event lifecycle
In MISP, an event is a container that groups a set of related indicators and their context — typically everything you know about a single incident, campaign, report or collection. A typical event goes through the following stages:
- Create the event with a short set of metadata (date, distribution, threat level, analysis stage, a descriptive title).
- Populate it with data — attributes (individual indicators), objects (structured groups of attributes), and attachments.
- Contextualise the data with tags, taxonomies, galaxy clusters and analyst data so consumers understand what it means and how much to trust it.
- Collaborate — receive proposals and sightings, discuss, and optionally delegate the event to another organisation.
- Publish the event, which makes it available to the eligible exports, notifies subscribers, and pushes it to the instances you synchronise with.
Editing an event (or any of its data) after publication automatically un-publishes it; you republish once you are done.
Creating an event
During this first step you create a skeleton event that holds only general information — you populate it with attributes and objects in the next stage. To start, click the Add Event button in the left-hand menu and fill out the form.
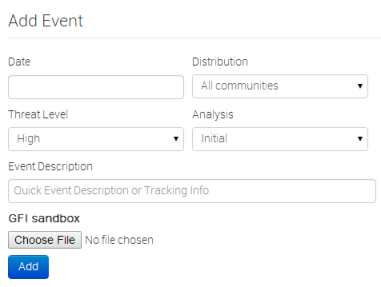
The form contains the following fields (in order):
- Date: The date the incident took place (not to be confused with the event’s creation date). Click the field to open a date-picker; it defaults to today.
- Distribution: Controls who will be able to see this event once it is published, and whether — and how — it is synchronised to other servers. The distribution is inherited by the event’s data: the most restrictive setting of the event and the individual attribute always wins. The options are:
- Your organisation only: Only members of your organisation can see the event. It will not be synchronised. (Upon push: not pushed. Upon pull: pulled.)
- This community only: Everyone in your MISP community — your own organisation, other organisations on this server, and organisations on servers that synchronise with this one — can see it. (Upon push: not pushed. Upon pull: pulled and downgraded to “Your organisation only”.)
- Connected communities: As above, plus the organisations one further hop away (the communities of the servers your server connects to). (Upon push: downgraded to “This community only” and pushed. Upon pull: pulled and downgraded to “This community only”.)
- All communities: The event is shared freely and can propagate from one server to the next without restriction. (Upon push: pushed. Upon pull: pulled.)
- Sharing group: The event is shared only with the organisations (and instances) defined in a sharing group, giving you fine-grained control. Selecting this reveals the Sharing Group dropdown. See Create and manage Sharing Groups.
MISP.default_event_distributionsetting; review it before saving, as the out-of-the-box default is the most permissive level. - Threat Level: The risk level of the event — High (sophisticated APTs and 0-day attacks), Medium (Advanced Persistent Threats), Low (general/mass malware), or Undefined. The field defaults to Undefined and can be refined later.
- Analysis: The current stage of your analysis — Initial, Ongoing or Completed.
- Event Info: A short, concise description of the event, ideally starting with your internal reference. Keep the detail for the attributes — this is a title, not a report. Note that the instance may automatically rewrite strings that match a regular-expression replacement configured by your administrator.
- Extends Event: Optionally turn this event into an extension of an existing event by entering the parent event’s UUID or ID. A live preview of the parent event is shown as you type. Leave blank if not applicable.
If your instance has event templates configured, the Add Event page offers a Create event via template instead shortcut. Templates give you a guided, pre-filled walkthrough (with attached objects and mandatory-field checks) instead of the blank form — handy for recurring report types.
Populating an event with data
Once the skeleton event exists you can add data to it. Everything is driven from the event view’s left-hand menu; the main entry points are Add Attribute, Add Object, Add Attachment and Populate from… (bulk import). You can also let MISP extract indicators for you with enrichment or from an event report.
Add Attribute
An attribute is a single indicator or piece of context — an IP address, a hash, a filename, a comment, and so on. Click Add Attribute to open the form.
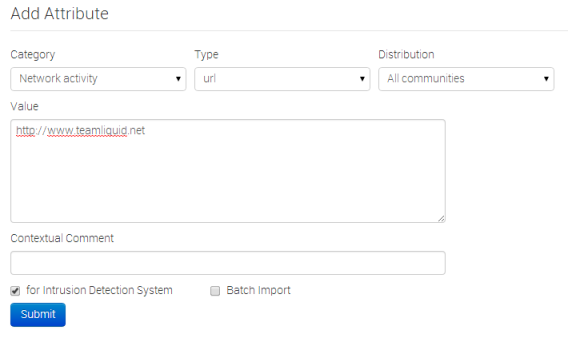
- Category: What aspect of the incident the attribute describes (for example Payload delivery or Network activity).
- Type: How that aspect is expressed (for example
ip-src,sha256,filename). The type list is filtered to those valid for the chosen category. For the full category/type matrix see Categories and Types. - Distribution: Who can see this attribute. In addition to the five event distribution levels, attributes offer Inherit event — which keeps the attribute’s distribution aligned with the event and is the recommended default (and the pre-selected value).
- Value: The indicator itself, in a format valid for the chosen type (for example
11.11.11.11forip-src). The value is searched for administrator-configured regular-expression replacements on entry, and is what the correlation engine matches on. - Contextual Comment: Free-text notes about the attribute. Comments are not used for correlation.
- Batch import: Tick this to paste several values of the same type into the value field (one per line) and have MISP create one attribute per line.
- For Intrusion Detection System (
to_ids): Marks the attribute as an actionable indicator of compromise, so it is included in the IDS/detection exports (NIDS rules, etc.) unless overridden by a warninglist. Leave it off for attributes that are contextual only. - Disable Correlation: Excludes this individual attribute from the correlation engine — useful for values that would otherwise create noisy, meaningless matches.
- First seen / Last seen: Optionally record the observation window for the indicator using the date-and-time slider. These feed the event timeline and are useful for decaying and time-based analysis.
Add Object
Objects group several related attributes into a single structured unit — a file object bundling a filename with its hashes and size, a domain-ip object, an email object, and so on — using community-maintained templates. Click Add Object, pick a template, and fill in its fields. Objects can also reference one another (for example, a network-connection object referencing the file that initiated it). See the MISP objects chapter for the full workflow, including object references and relationships.
Add Attachment
Use Add Attachment to upload files — malware samples, external analysis reports, or artefacts dropped by the malware.
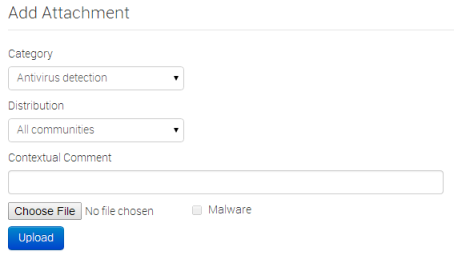
- Category: What the file describes (defaults to Payload delivery).
- Distribution: Who can see the attachment; the same options as attributes.
- Contextual Comment: Optional notes.
- Values: The file(s) to upload — you can select several at once.
- Is a malware sample (encrypt and hash): Checked by default. When set, the file is zipped and password-protected (password
infected) so users cannot accidentally execute it, and it is stored as amalware-sampleobject with its hashes computed automatically. Untick it only for benign files, which are stored as plainattachmentattributes. - Object template / Advanced extraction: Choose the object template used to represent the upload; when advanced extraction is installed, MISP can pull additional attributes out of the file (for example from a PE binary).
Populate from…
When you already have a list of indicators or a structured export, use Populate from… to create many attributes at once. The button opens a chooser offering:
- MISP JSON — merge event content from a MISP JSON file into this event.
- Freetext Import — paste any block of text (a report, an email, a list of IOCs) and let MISP find and classify the indicators.
- Populate using a Template — fill a guided, sectioned form to generate attributes.
- OpenIOC Import — import indicators from a
.iocfile. - ThreatConnect Import — import from a ThreatConnect CSV export.
- (Experimental) Forensic analysis – Mactime — import a mactime timeline.
- Any enabled import module — additional formats (for example CSV, STIX, various vendor reports) provided by misp-modules appear here automatically.
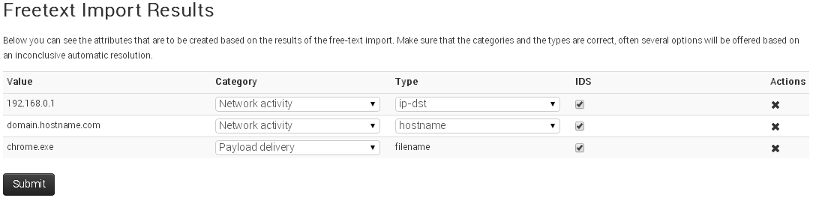
The most commonly used option is Freetext Import: paste a line-break separated list of indicators and MISP suggests the most likely category/type for each one.
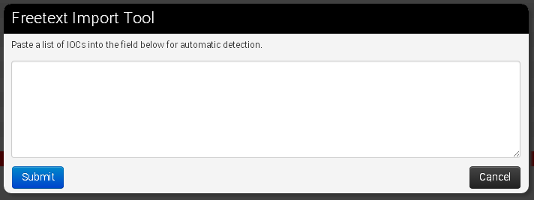
Because many values are valid for several category/type combinations, MISP proposes the most common option and lets you adjust the category, type and IDS flag per row before saving. Values that already exist elsewhere are flagged with their correlations, and values that hit a warninglist are highlighted so you can decide whether to keep them.
Adding context to your data
Raw indicators are only half the story. MISP offers several complementary ways to say what your data means and how much to trust it.
Tagging: taxonomies, galaxies and tag collections
Tags classify events and attributes. Next to the Tags field on an event (and on each attribute) you will find two add buttons:
- Add a tag (globe icon) attaches a global tag that is shared and synchronised along with the event.
- Add a local tag (user icon) attaches a local tag that stays on your instance only — it is never exported or synchronised. Local tags can only be applied by users of the instance’s host organisation.
Clicking either button opens a two-step picker. The first step lets you choose from your Favourite Tags, Tag Collections, Custom Tags, All Tags, or a specific Taxonomy Library (one entry per enabled taxonomy). The second step lets you pick the actual tag/predicate value. Taxonomies are curated, machine-readable tag vocabularies (TLP, PAP, admiralty-scale, and many more) — see the Taxonomies chapter.
Galaxy clusters are attached through a separate control (the Galaxies field, with its own Add new cluster / Add new local cluster buttons). While they are stored as tags under the hood, galaxies represent richer knowledge objects — threat actors, malware families, MITRE ATT&CK techniques, sectors, and so on — with descriptions, synonyms and relationships. See the Galaxies chapter.
Tag collections let you apply a curated bundle of tags in one action — pick the Tag Collections entry in the tag picker and the collection’s member tags are expanded onto the target.
Analyst data: notes, opinions and relationships
Beyond tags, MISP lets analysts annotate almost any element — events, attributes, objects, galaxy clusters, event reports, and even other annotations — with analyst data:
- Notes — free-text commentary in Markdown.
- Opinions — an explicit confidence/agreement score (0–100) with an optional comment, so consumers can see whether the community trusts a piece of data.
- Relationships — typed links from one element to another (including elements in other events), building a graph of related intelligence.
Analyst data is created from the context icon shown next to an element’s UUID and is shared and synchronised alongside the data it annotates.
Enrichment
MISP can automatically look up extra information for your data through misp-modules:
- Enrich Event (left-hand menu) runs the applicable expansion modules against the whole event as a background job and appends the results.
- On an individual attribute, the Add enrichment action (asterisk icon) queries expansion modules that support that attribute’s type; Query Cortex does the same via Cortex analysers where configured.
- If hover enrichment is enabled on your instance, hovering over (or clicking the magnifier on) a value shows on-the-fly lookups without leaving the page.
Decaying scores
If your administrator has configured decaying models, attributes can carry a decaying score column showing, per model, how relevant the indicator still is over time (green while valid, red once it has decayed). Clicking a score opens the decay simulation tool. Decaying lets consumers automatically age out stale indicators instead of trusting them forever.
The event view
The event view is where you spend most of your time. It shows the event’s metadata, a set of collapsible content panels, and the full attribute/object table with inline tools.
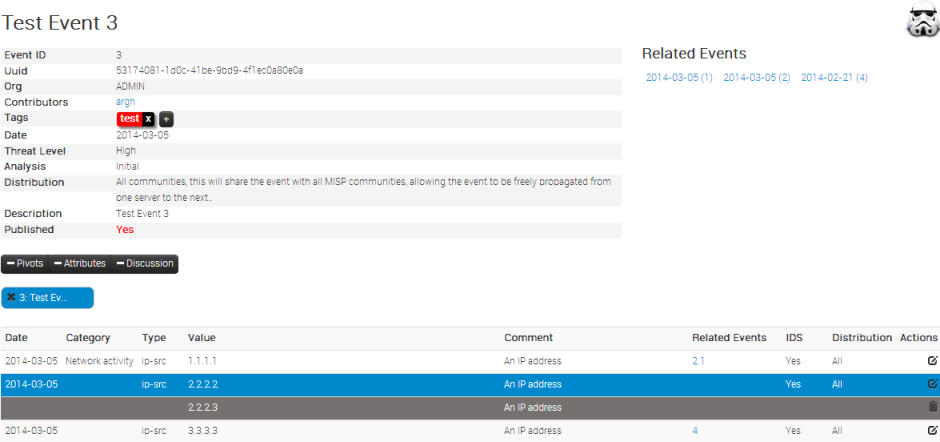
General event information
The information block at the top of the view shows (depending on your permissions and the event’s state):
- Event ID and UUID — the UUID row also offers quick actions to extend this event and to check this event on other servers.
- Creator org / Owner org — the organisation that authored the event versus the organisation that owns the local copy (the latter is visible to site admins).
- Contributors — organisations that contributed via proposals; click a logo to see a filtered history.
- Protected Event — when present, the event is cryptographically signed so recipients can verify it has not been tampered with in transit.
- Tags, Date, Threat Level, Analysis, Distribution — the metadata set on creation, editable inline.
- Warnings — data-quality or security warnings about the event.
- Published — whether the event is published, together with its first- and last-published timestamps.
- #Attributes — the attribute count, with the number of objects in parentheses.
- First recorded change / Last change / Modification map — when the event changed, with a sparkline of edit activity.
- Extends / Extended by — links to the parent or child events when this event is part of an extended event.
- Sightings / Activity — how many times the event’s data has been seen (with an activity sparkline) and a shortcut to advanced sightings.
- Correlation — whether correlation is enabled for the event, with a toggle to turn it off (useful for large, low-value events).
The right-hand column adds side panels for related events, related feeds and related servers where applicable.
Content toggles
A row of toggle buttons controls which panels are shown in the main content area. You can collapse and expand each independently:

- Pivots — the pivot thread graph of events you have traversed (see below).
- Galaxy — the galaxy clusters attached to the event.
- Event graph — an interactive graph of the event’s objects, attributes and their references/relationships.
- Event timeline — a time-based view built from the attributes’ first/last seen values.
- Correlation graph — a graph of the events this one correlates with.
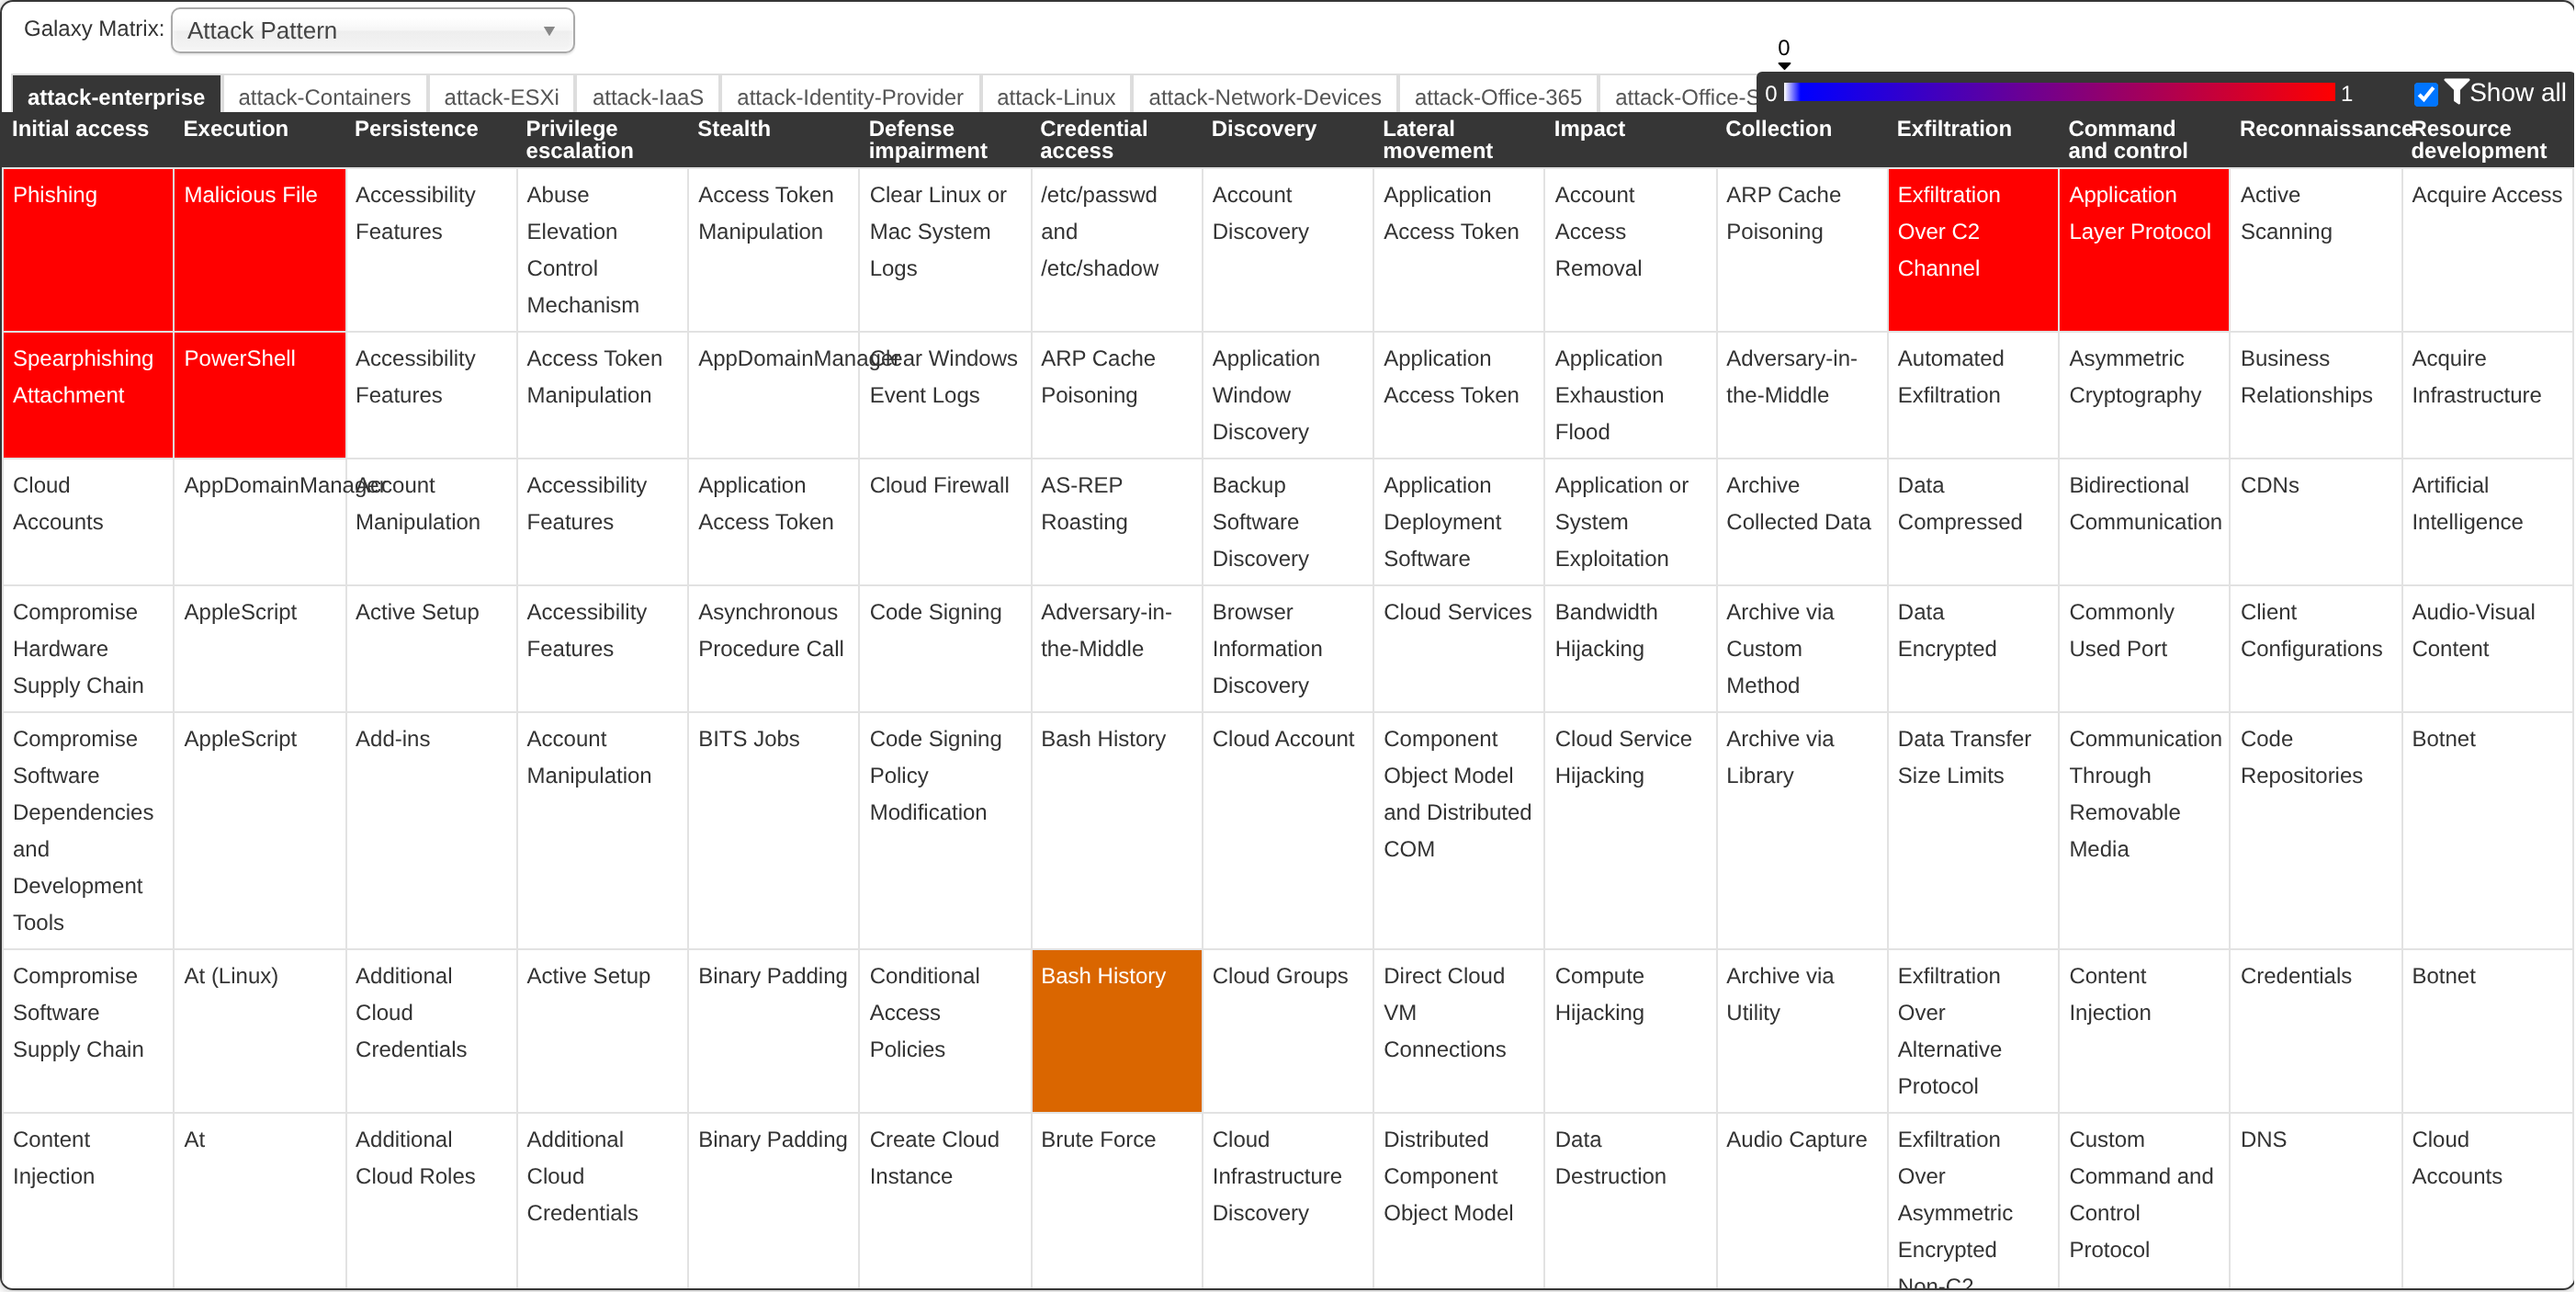
- Galaxy matrix — the ATT&CK-style matrix highlighting the techniques present in the event.
- Event reports — the rich-text event reports attached to the event (this panel opens automatically when reports exist).
- Attributes — the attribute and object table (see below).
- Discussion — the event’s discussion thread (shown when you have access to discussions).
When you open the Galaxy matrix panel on an event carrying ATT&CK galaxy clusters, MISP highlights the techniques present in the event on the matrix:
The attribute table
The Attributes panel lists every attribute and object in the event. The columns include the date, a context icon (analyst notes/opinions/relationships), category, type, value, tags, galaxies, comment, correlation and related events, IDS flag, distribution, sightings and activity, and — when enabled — SightingDB and decaying-score columns.
Each row offers inline tools (subject to your permissions):
- Inline edit — click a category, type, value, comment or distribution cell to edit it in place.
- Sightings — thumbs-up to add a sighting, thumbs-down to mark a false positive, and a wrench for advanced sighting options. See Sightings.
- Enrichment — the asterisk (expansion modules) and eye (Cortex) icons, as described under Enrichment.
- Edit / Delete — standard actions; deletion is a soft delete on published events (so it can propagate) and can be restored, or a permanent delete on events that were never published.
- Tag / Galaxy — add tags or galaxy clusters directly on the row.
Attributes that belong to an object are grouped under that object; proposals appear inline with the attribute they affect (see Proposing changes).
Event discussion
Every event has its own discussion thread where eligible users can talk about it. Posters are shown by organisation and an anonymised user identifier (their email is only visible to members of their own organisation). Use the quick-response field at the bottom of the thread to post without reloading the page, and the [quote], [event] and [thread] tags to quote a post or link to another event or thread.
Collaborating on events
Proposing changes to another organisation’s event
If you can see an event created by another organisation but cannot edit it directly, you can suggest changes as proposals (shadow attributes). Use the propose buttons that replace the add/edit controls to propose a new attribute or a change to an existing one; the creating organisation can then accept or discard your proposal.

When the creating organisation is on another instance, they receive your proposal on their next pull, and republishing the event sends the accepted change back to you. For richer, non-destructive collaboration (commentary, confidence, typed links) consider analyst data instead.
Sightings
A sighting records that you actually observed an indicator (or that it is a false positive). Sightings are a lightweight, high-signal form of feedback that feeds decaying and lets producers see which indicators are still active. Add them from the thumbs-up/thumbs-down icons on each attribute row, or in bulk. See the Sightings chapter for sighting policies, anonymisation and SightingDB.
Contacting the reporter
To reach the organisation that reported an event, open the event and click Contact Reporter (available when the creating organisation is local to your instance). Your message is emailed together with the event’s details.
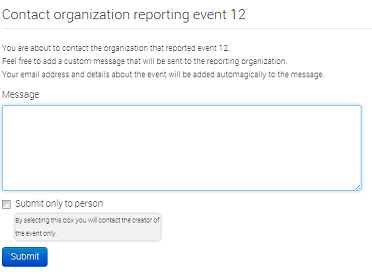
By default every member of the reporting organisation is emailed; tick the checkbox to reach only the individual reporter.
Delegating an event
You can ask another organisation to (re)publish an event on your behalf — for example to publish anonymously through a trusted partner. Use Delegate Publishing from the event menu; the recipient sees the request under View delegation requests and can accept or discard it. See the Delegation chapter for the full flow.
Publishing an event
Once the event holds everything you want to share, finalise it by publishing.
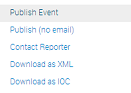
Publishing an event:
- makes its data available to all eligible exports (and readies IDS-flagged attributes for detection-rule generation);
- emails subscribed, eligible users (those with auto-alert enabled and the right to see the event); and
- pushes the event to the instances you synchronise with, from where it propagates further according to the distribution rules.
The event menu offers several variants:
- Publish — the normal publish, with notification emails.
- Publish (no email) — publish without alerting anyone; use it for minor edits.
- Unpublish — retract a published event.
- Publish Sightings — push sighting updates without republishing the whole event.
- Delegate Publishing — hand publication to another organisation (see above).
- Publish to ZMQ / Kafka — emit the event to the real-time ZeroMQ or Kafka feeds, when those plugins are enabled.
If your instance has background jobs enabled, publication is queued and may not complete instantly.
Extending events
An extended event lets you build on an existing event without editing it — ideal for adding your own analysis to a report you received, or for maintaining a long-running campaign event as a series of contributions. Create one either by entering the parent’s UUID in the Extends Event field when creating an event, or with Extend this event from an existing event’s UUID row. The event view can then show the combined (extended) picture, and search filters let you include or isolate extensions. See the Extended events chapter.
Browsing and searching
Listing events
List Events (left-hand menu) shows the most recent events. The list includes, among other columns, the published state, creator and owner organisations, tags and galaxies, the attribute count, the event date, threat level, analysis stage, the event info, distribution, and per-row action buttons (view, edit, publish, delete — subject to your permissions).
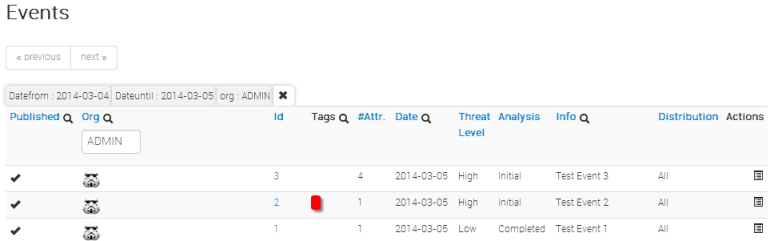
Use the filter/query controls at the top of the index to narrow the list by any combination of criteria, and the scope tabs to switch between your organisation’s events and everything you can see.
Listing and searching attributes
List Attributes produces a comparable list at the attribute level.
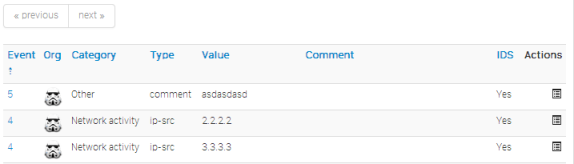
To find specific data, use the attribute search, which is backed by the same powerful query engine as the REST API: search by value, type, category, tag, organisation, date range and more, and export the result set directly. Because the search UI and the API share the same filters, anything you can find interactively you can also automate.
Editing events and attributes
Every event and attribute can be edited. Find it (by browsing or searching), then use the edit control — for attributes you can also edit most fields inline in the attribute table, or double-click an event in a list to jump straight into edit mode. The edit form is the same as the corresponding creation form, pre-filled with the current values. Remember that editing an event (directly, or indirectly by changing one of its attributes) un-publishes it, so you will need to publish again once you are done.
Create and manage Sharing Groups
Sharing groups are re-usable, fine-grained distribution lists. They let you combine organisations from your own instance (local organisations) with organisations from directly or indirectly connected instances (external organisations), and control exactly which instances the data may travel to. Sharing groups can be created by any user with the sharing group editor permission, and edited by members of the creating organisation or of any organisation marked as an extender — the mechanism for delegating membership management to a trusted partner (for example a sector representative who knows who should be included).
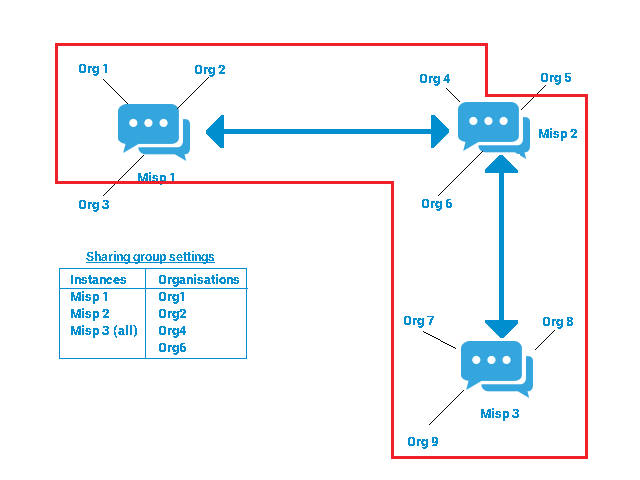
Use sharing groups when the standard distribution levels cannot express the sharing you need; otherwise prefer the simpler distribution levels, and prefer the Inherit event distribution on attributes whenever their sharing group would match the event’s. Sharing groups can add complexity for users and some processing overhead on the data marked with them.
Create and edit sharing groups from Global Actions → List Sharing Groups / Add Sharing Group. The editor is a wizard with four tabs:
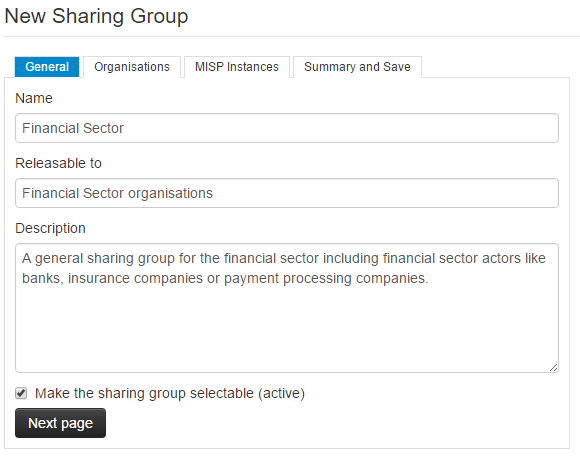
- General: Metadata describing the group.
- Name: The unique name of the sharing group.
- Releasable to: A human-readable description of who the data may be shared with. This is informational only (aimed at extender organisations); MISP does not enforce it.
- Description: A natural-language statement of the group’s intent.
- Make the sharing group selectable (active): Uncheck to retire a group — existing data keeps honouring it, but it is no longer offered when setting distribution, reducing clutter.
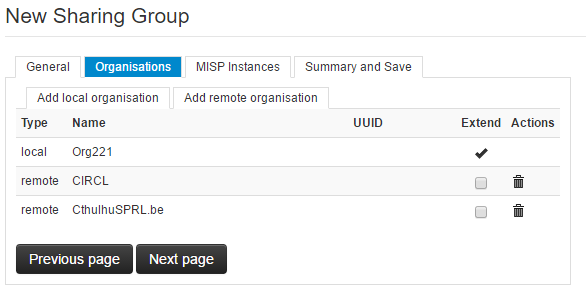
- Organisations: The list of organisations named in the group, split into local and remote/external tabs. (Local organisations have at least one local user; remote organisations are created automatically when synchronising. A remote organisation can be converted to local if one of its users later joins your instance.) Tick extend to let an organisation edit the sharing group — the creating organisation is always an extender.
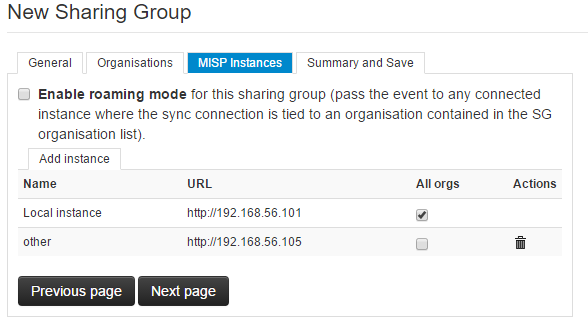
- MISP Instances: The instances the data may be synchronised to. Any user who can see the event on a given instance may pull it, but the organisation distribution list still applies.
- Enable roaming mode: Ignore the instance list and rely purely on the organisation list — an instance becomes eligible whenever its host organisation is in the list. This removes the need to know specific instance URLs, at the cost of relying on correctly configured host-org settings.
- Add instance: Add an instance from those configured under Sync Actions → List Servers.
- All orgs: Automatically include every organisation on the selected instance, without naming them individually — useful for exchanging with a whole community, and for privacy-sensitive communities that prefer not to enumerate members.
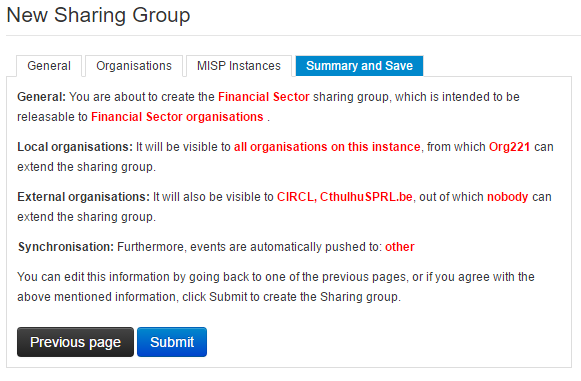
- Summary and Save: A highlighted summary of the whole configuration. Review it carefully before saving — mistakes here can expose data to the wrong organisations or grant unwanted editing rights. Note that a sharing group has no effect until it is selected as the distribution of an event or attribute.
Exporting data
The recommended way to get data out of MISP is the search/export engine (restSearch), which is shared by the web UI, the built-in REST client and the automation API.
For a single event, use Download as… in the event menu to export it in any of the supported formats — MISP JSON/XML, OpenIOC, CSV (with or without context), STIX 1 and 2, RPZ, Suricata/Snort/Bro rules, a plain-text value list, and any enabled export module. Each option is generated on demand from the current data.
For bulk and automated export, drive /events/restSearch and /attributes/restSearch directly (or through the REST client), which accept the same filters as the search UI and return the same wide range of formats. See the automation chapter for the full parameter and format reference.
The older two-page cached-export page (previously reached via Export) is disabled by default on current instances in favour of restSearch; you may not see it at all.
Connecting to other instances
Synchronising with other MISP servers — adding sync connections, configuring push and pull rules, and running feeds — is covered in the Sharing & synchronisation chapter (server administration) and the Managing feeds chapter. Setting up sync also depends on having an appropriately configured sync user and authentication key, described in Administration.
REST API
MISP exposes a full REST API for programmatic access to events, attributes and almost every other object, using JSON (or XML) over HTTP with an API key. The canonical reference — authentication, the restSearch filters, the complete list of return formats, and the interactive OpenAPI documentation and built-in REST client — lives in the Automation & API chapter. For Python, see PyMISP.
Multi-factor authentication (TOTP/HOTP)
MISP supports time-based and counter-based one-time-password multi-factor authentication (TOTP/HOTP). For how to enable and configure it instance-wide, see the Administration chapter.
Generating TOTP/HOTP tokens
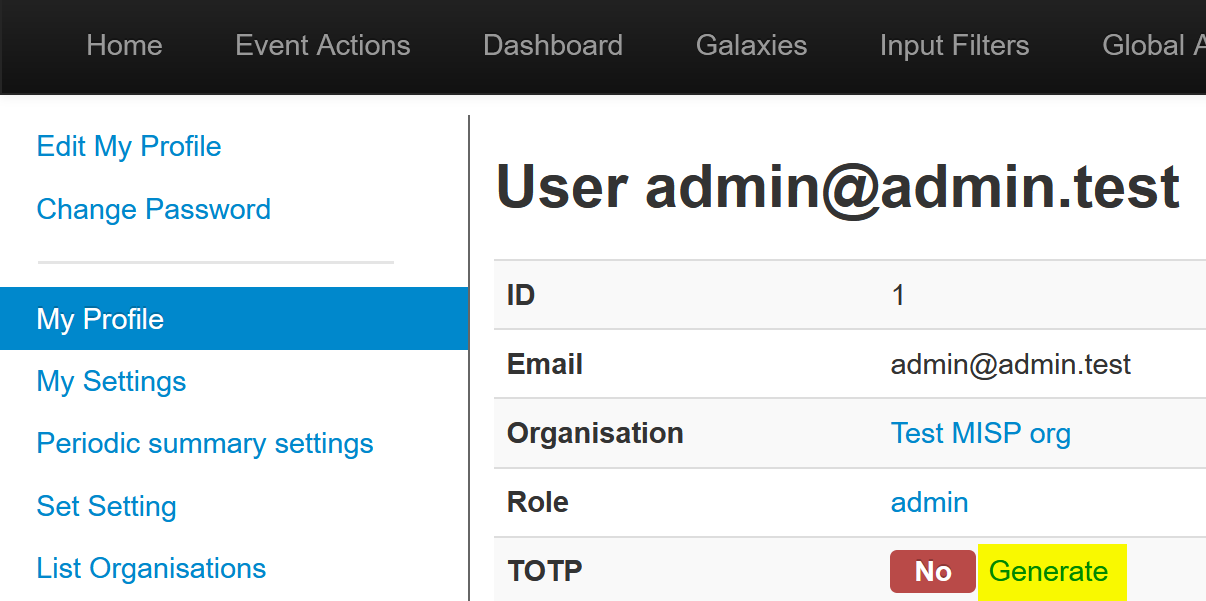
From the top menu bar, go to Global Actions → My Profile and click the TOTP Generate button.
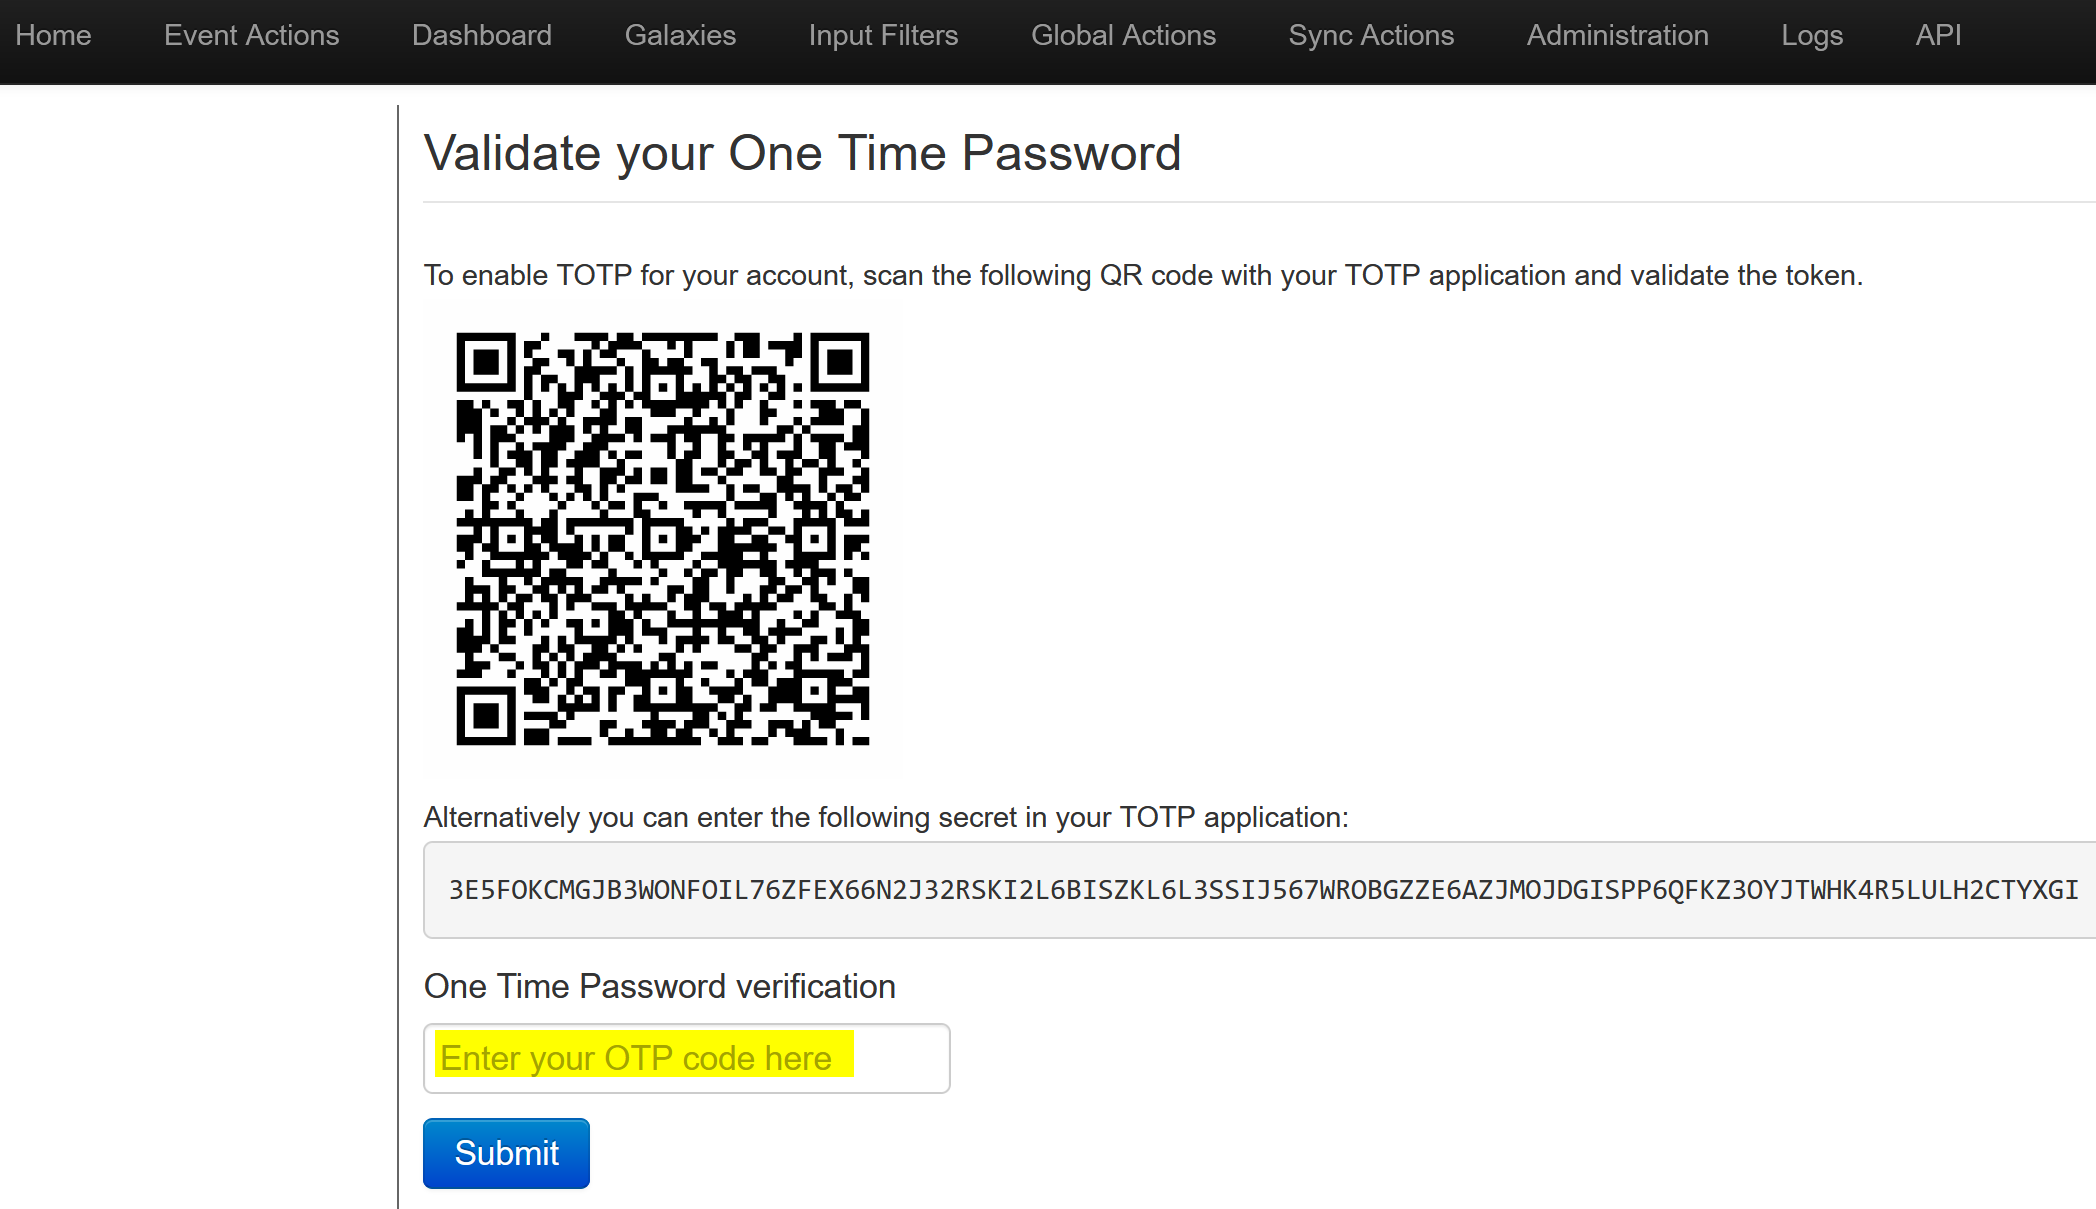
On the next screen, add the secret to your preferred authenticator application (for example a mobile authenticator or a desktop tool) and confirm the setup by entering a verification code.
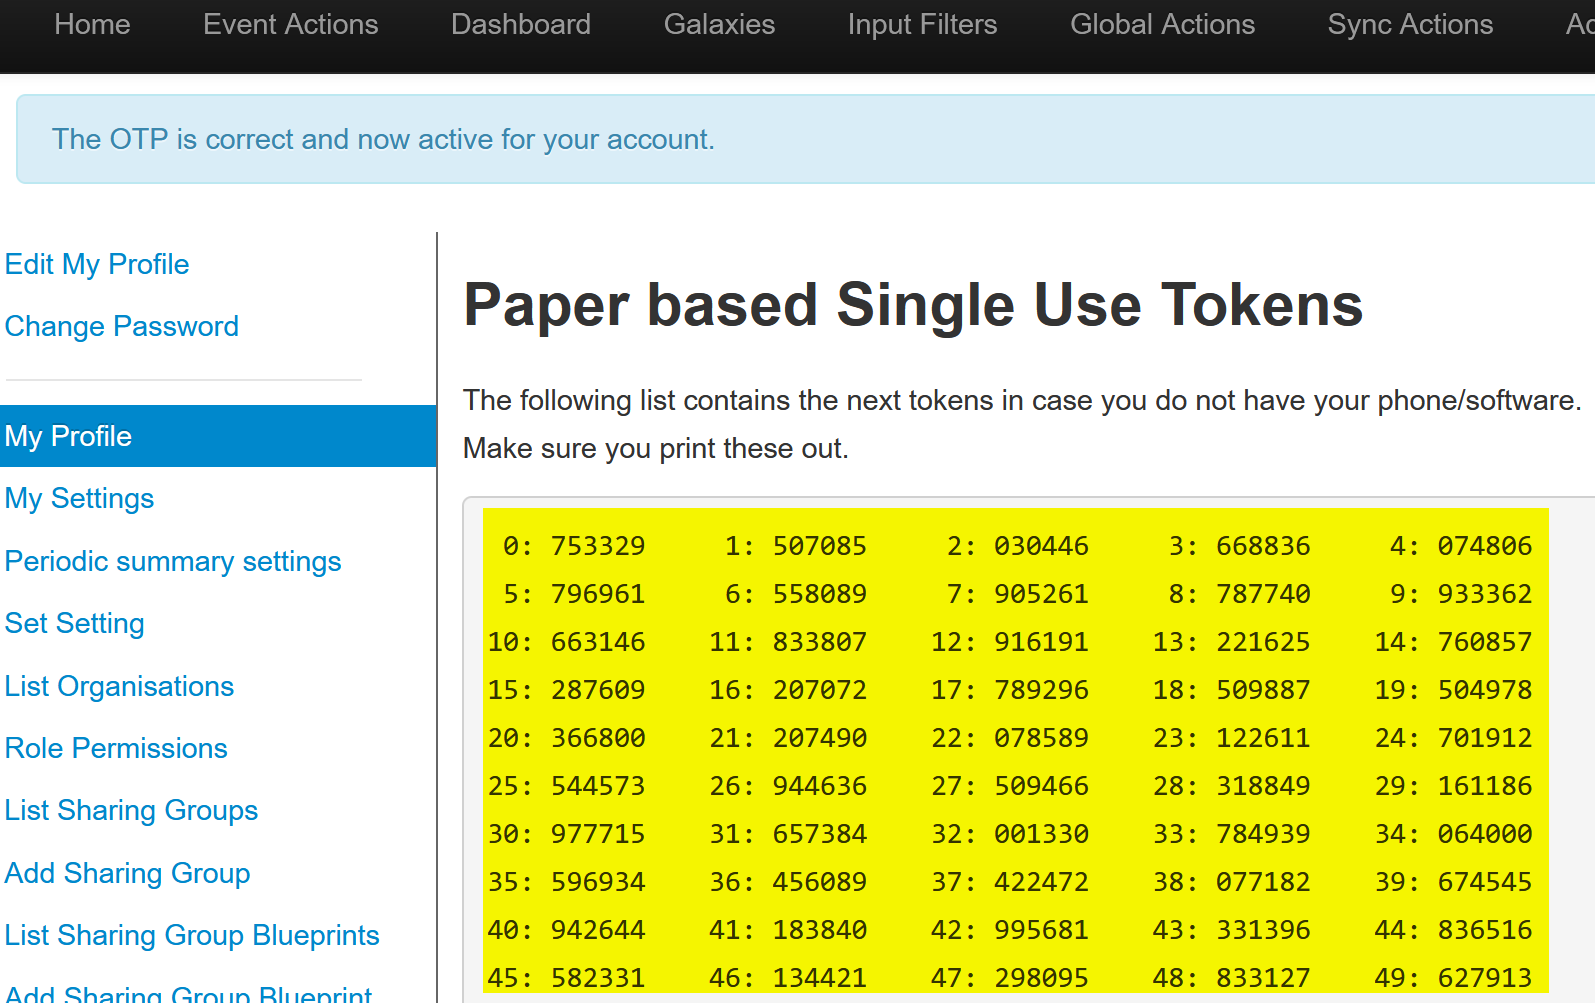
Once validated, you are shown a set of 50 single-use HOTP (paper) tokens as a fallback for when your authenticator is unavailable.
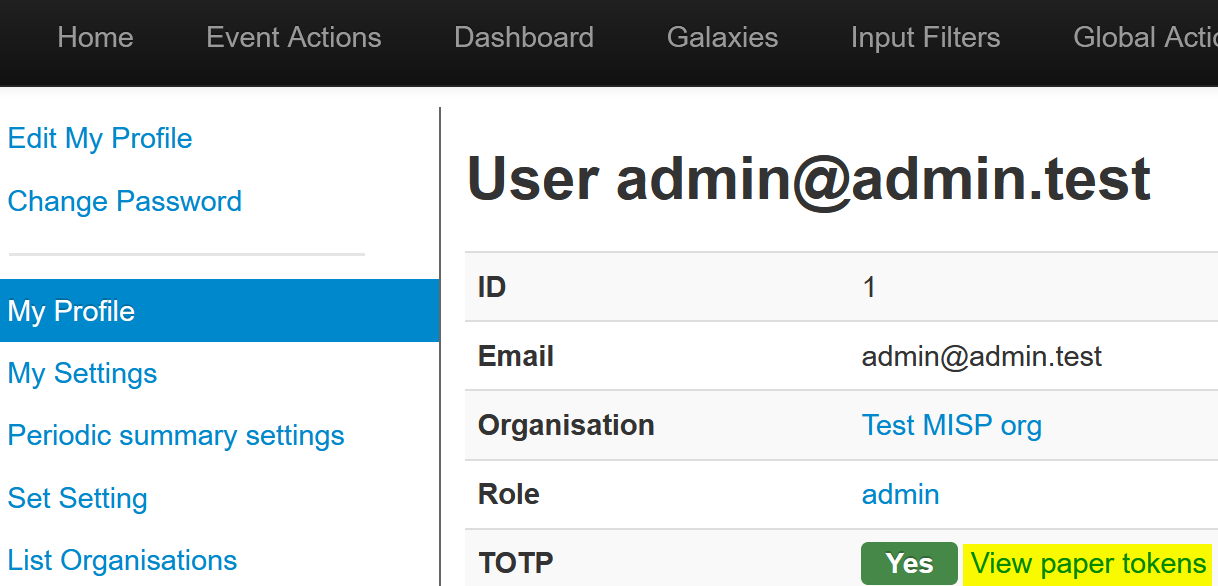
You can view these tokens again later from your profile via the View paper tokens button.
Logging in with TOTP/HOTP
After setting up TOTP/HOTP, you are prompted for a one-time password on subsequent logins.
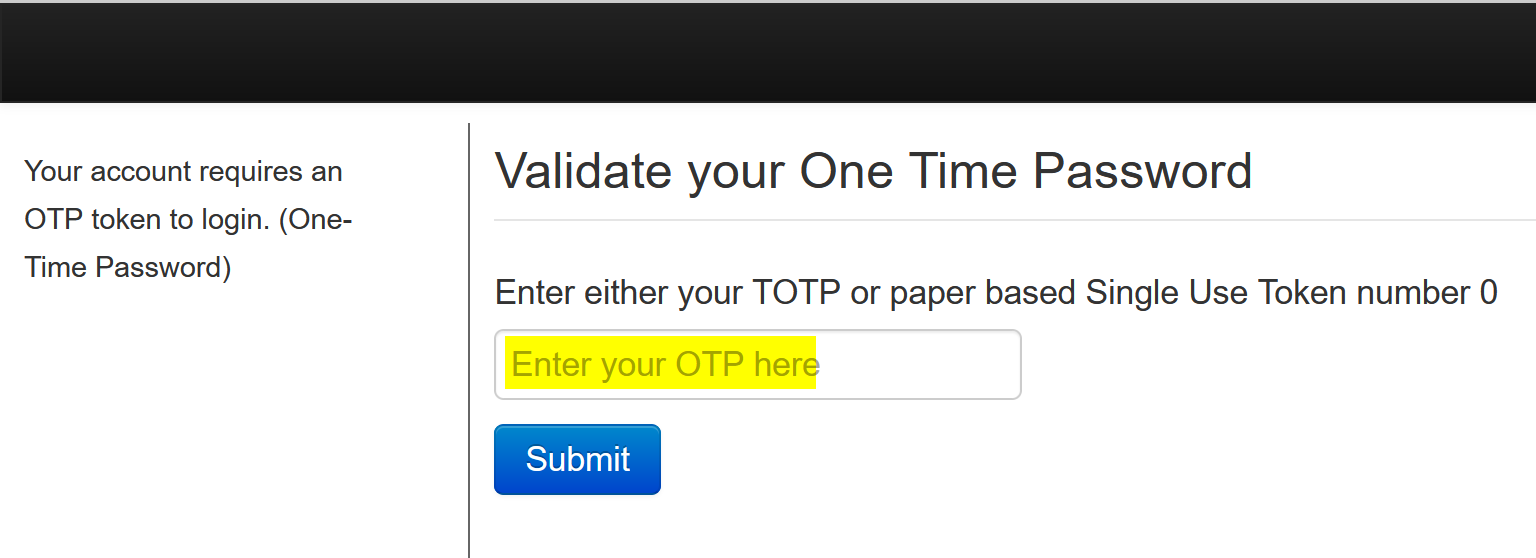
Enter either a code from your authenticator or one of the numbered paper tokens.
Deleting and regenerating tokens
Removing a user’s TOTP/HOTP setup can only be done by site or organisation admins. Contact your organisation admin (preferred) or a site admin if you need to reset your tokens.
Combining multiple factors
You cannot combine multiple forms of multi-factor authentication at once: once TOTP/HOTP is assigned to your user, email OTP is not also used for it. If your instance has email OTP configured, it applies again once your TOTP/HOTP setup is removed.